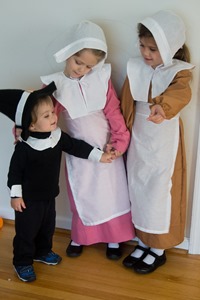
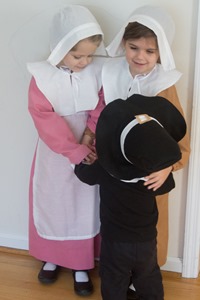
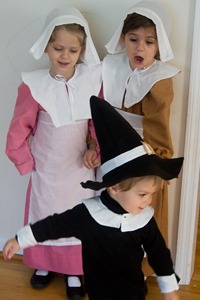
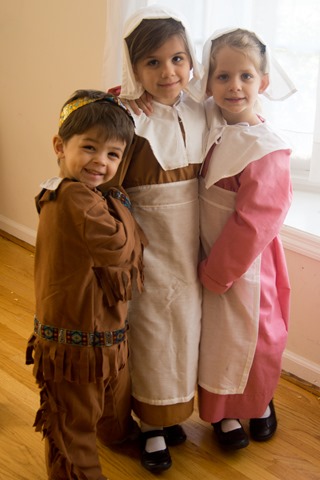
Please excuse the unironed costumes. I didn’t want to wait until Halloween to take the pictures for my quasi-tutorial here, but today turned out to be very, very chaotic. You can still totally get the point, I think. ;) I should also add that I can’t tie bows for anything, and someone else will have to tie them on Halloween so they aren’t sticking out everywhere! Haha.
I thought it would be really cool for the children to dress up as pilgrims (and Squanto) for Halloween this year—there are many qualities of the pilgrims and Puritans that I find very imitable for young children, and thought dressing up as such would raise their curiosity in a rather good historical subject—and pilgrim costumes are not very hard to find on Amazon. But even at the relatively affordable costume prices, with four children, we were looking at $80-$100 for costumes that were made of cheap material, which would tear easily and not make good additions to the dress-up bin. I just couldn’t quite bring myself to do it!
Then, after I started trying to figure out how to make them myself, I realized that pilgrim costumes must not be a very common DIY, because I could find very little information on Pinterest or elsewhere on how to make… anything. I was hoping for a bonnet pattern. A collar pattern. Anything. Nada.
I eventually found this page from Plimoth Plantation on what pilgrims actually wore (most specifically, that they didn’t particularly wear black), and this page for a simple, more-accurate-than-most-costumes bonnet (pilgrims don’t seem to have worn the frilly brimmed or gathered bonnets that they are often depicted with now). I was afraid, however, that if I dressed them like completely accurate pilgrims, then no one would realize they were supposed to be pilgrims at all. And that’s no fun for kids. So I decided: no black, because I had no idea what I would do with black dresses after Halloween was over; and I would do the simple bonnet, and make the “simple” theme a pervasive one and an opportunity to talk about dressing as for God and not for man or fashion; but otherwise I would somewhat loosely abide by modern ideas of pilgrims, i.e., the bib-type collar, the stark white, the slight flare on the bonnet, the buckles on the (anachronistic) boy pilgrim hat, and so on.
I also ordered a Native American costume for our Squanto. I figured making three pilgrim costumes would be quite enough for a somewhat last-minute dash!
Bearing all that in mind, practically, I wanted to write down somewhat what I did, in case someone else out there would also like to make a non-paper pilgrim costume for their child! 🙂
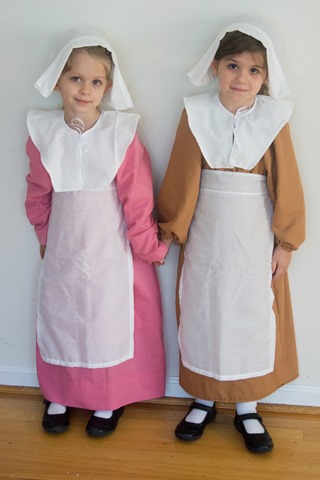 Girls: the dresses
The need was for a long-sleeve dress, which is surprisingly hard to find a pattern for, and also something quick-ish, because I didn’t want to spend a lot of time sewing a dress in a plain color that was unlikely to be “pretty” enough for everyday wear. I soon settled on a peasant-style yoke, which are soooooo easy, but they tend to be a bit poofy and unfitted and I thought it might be worth a little extra effort to find a pattern that would be a bit more tightly drawn (and useful for making other dresses in the future that weren’t destined for the dress-up bin). I finally settled on the Molly Peasant Dress, which cost me $10. Although I could have made a regular peasant dress for free, I think it was a good decision; the Molly takes very little fabric (the entire pink dress is made from one single curtain panel) and is indeed more fitted, and I look forward to using it for more dresses in the future! I think the cap sleeve version (which is included) is really cute. I made the brown dress mostly according to the pattern, 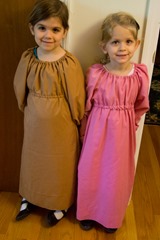 with a $2 sheet from the Goodwill store, and long sleeves with elastic at the bottom (as per the pattern). I made the pink dress (from a $2 curtain) without a lot of the “tack in place” sewing (which is to say, when the pattern said straight-stitch and then finish the edges, as two separate steps, I just serged it all in one), and cuffed the sleeves instead of elasticizing them. Now, here’s the huge caveat with this pattern: pilgrim dresses definitely should not be high-waisted. I had originally planned to make a vest-like cover of the same fabric, ideally with buttons, to make it more realistic, but once I actually tried the dress on the girls, I think the giant pilgrim collar distracts from the high waist and that it’s fine for a Halloween costume.
Girls: the bonnets 
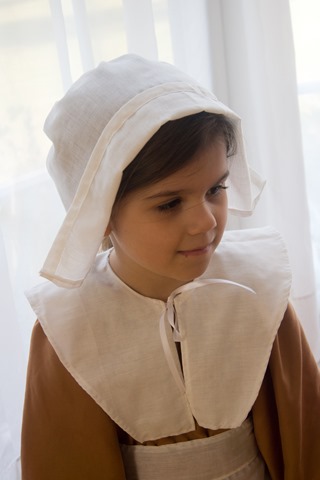
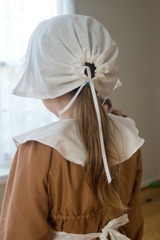 All the white stuff was made from a single large new 99¢ sheet from Ikea. Doesn’t get any cheaper than that! And it’s an extremely cheap sheet, so the fabric is rough and “matches” the pilgrim milieu. I followed the general idea for bonnets in the post I linked above, basically measured the girls’ heads side-to-side, to made sure my
  rectangle was adequately wide, and then folded the brim back (and basted it down, except for about two inches on each side, so that it would flare out as seems more typical with pilgrim costume bonnets) with it on the girls’ actual heads. I didn’t include side ties because they don’t seem historically accurate. The bonnets were fundamentally very easy.
 Girls: the aprons
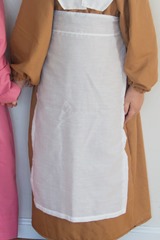
 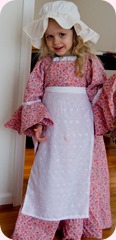 Aprons are soooo easy. Especially the ones from this era, which are basically giant rectangles. I had made pretty much identical ones for their colonial costumes in February, but those had been eyelet lace (which doesn’t fit with the pilgrim-simplicity theme, obviously) and since aprons are so easy, and I had the fabric already, I made two new ones. I should say at this point that the outfits as a whole, including the aprons, are rather less poofy and full-skirted than a lot of depictions. I’m not sure which is more historically accurate. If I had it to do over, though, I would have added some extra yardage to the skirts of both the dresses and the aprons, so the skirts would look more like the colonial ones did.
 Girls: the collars
And here we come to the part I really struggled with! Again, what is historically accurate seems quite broad, but mostly it seems like there weren’t these extraneous giant white things hanging around their necks for no obvious reason. But this also seemed to me to be a key to making the kids look like pilgrims to random viewers, since it is so much a part of our modern conception. So I made collars. I couldn’t find a pattern for these at all, so I made my own:
You can download it—click the picture. There are lots of extra lines, obviously; think about what your collar will look like (round or elongated) before you decide which lines to cut! Children’s necks are not very differently sized in diameter, so I was able to use the center hole unaltered for everybody from my 1-year-old to my 5-year-old. (It looks big on the one-year-old, but that’s actually an optical illusion because his shirt is a turtleneck.) You can easily add extra seam allowance on the outside lines for wider shoulders, and cut the inside hole a teeny bit bigger (or just sew with a deeper seam allowance) for older kids. I did the circle collar for our boy pilgrim and the elongated one for the girls; if I had more time / less costumes, I considered doing buttons down the front… I ended up doing ribbon ties at the top instead. The really easy thing would have been to cut these out of white felt or fleece, single-layer, no sewing. But I didn’t have white felt and have been too busy/tired to go to the store to get some! So instead I used my reliable old sheet, cut two layers, sewed them together around all the edges (leaving a hole on the inside back of the neck area to turn), turned them right side, top-stitched all around, and sewed up the hole. I should have left the hole at the end of one of the straight parts of the collar to turn, and then been able to tuck it back inside, and top-stitch, all very neatly. Live and learn!
 Boy: the outfit
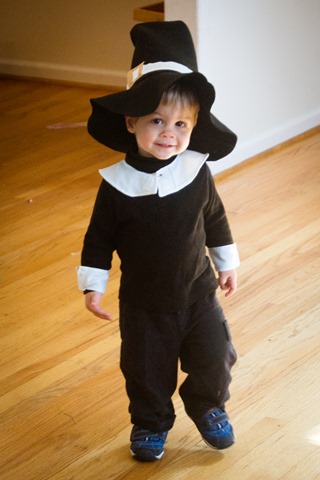
Since I was dealing with a one-year-old, and dress-up is pretty meaningless at that age… I hunted and found a plain black shirt and plain black pants out of his drawer. That said, you could make a peasant type shirt and simple elastic pants, if there are no plain clothes in your boy’s drawer. Lose the ruffles and the skirts and they’re workable enough boy patterns, especially if you used a drawstring tie on the shirt instead of elastic. :) For Halloween, I need to find him some kind of belt! And tall white knee socks.
Boy: the collar 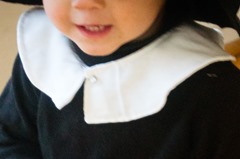 The same as the girls’, but in the fully round version. And I left both ends open to turn it right-side, and then tucked the ends in at an angle before top-stitching so that there is a bit more of an upside-down V shape at the front. This is much easier than the bib style I did for the girls.
 Boy: the hat
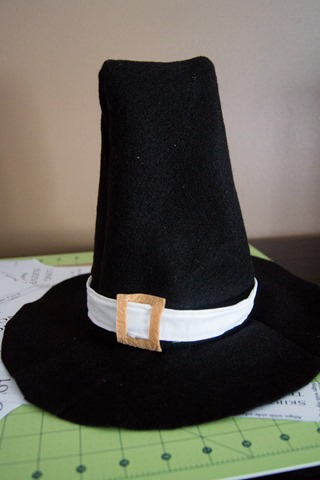
This was an ADVENTURE, let me tell you! I’ve never made a hat and couldn’t find anything remotely like instructions or a pattern online. Nothing. I finally decided to just go for it and see how it turned out. This was an attempt at a fully stereotypical pilgrim hat, not an actual in-any-way-accurate one…
First I made the tall part. (See, I’m so hat-ignorant I don’t even know what that’s called. The non-brim.) I measured my kiddo’s head, about where a hat would seem to fall, cut a piece of felt a little bigger than that (and what seemed a good height, in the other direction), serged it up the side, and stuck it on his head. Felt stretches a little, and it fit. Obstacle one complete; I now had a big black tube that fit snugly on my son’s head. But how to get the brim and the shaping? 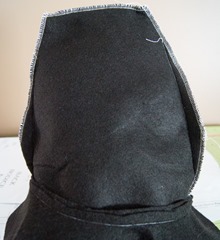 Shaping: I experimented a little and kept sticking it on the poor child’s head to test, but since it’s black, just for Halloween, and he’s a baby, I think it’s good enough by far. You can see what I ended up with (right, picture of the hat inside out), and when it’s right-side I kind of punch it down on top a bit and round it out to make it look even a little better. If he wasn’t going to outgrow it right away, I think this could be a pretty decent way to go about it, and add some starch or something to keep it from folding flat. Of course the great thing to do here—which was way too much trouble for me—is to make a proper cone with a tiny circle for the top, like a birthday hat with the very top part cut off and replaced with a flat piece. Brim: I suggest using actual math for this step. If you fold the tube flat, measure, and double, you have a circumference, which you can use to find the diameter of the circle you should cut for the inside of the brim. Add about six inches (three all around) more to get the diameter to use for the outside of the brim. I didn’t use math,
 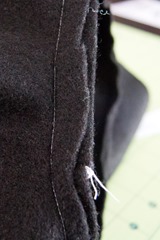 because I wasn’t near a calculator. Trial and error also worked but it was a lot more work! Anyway, you’re going for a shape pretty much like the collar shape, except without a cut down the middle—you want a solid, flat, wide ring. I should also add that the little felt rectangles at the store will not be big enough, you want felt by the yard, which is quite cheap but I’ve only found at an actual fabric store. Then turn your hat-top right side and slide the brim over the end of it, matching the inside of your newly-cut felt ring with the right side of the hat-top-tube. If you’ve done the math right, this will lay flat with no gathers or folds (see right, the fabric to the right of the seam, and under the seam, is flat). Pin as much as necessary (I’m not a fan of pinning,
 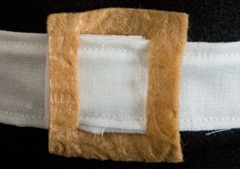 and even I used four!) and stitch around, continuing to make sure fabric lays flat. Buckle: This doesn’t really need instructions, but I was pretty pleased with how it turned out for as simple as it was. It’s just a piece of tan felt with two slits cut in it, and then a long strip of the white fabric sewn into a belt and made to fit just above the rim. Easy. Again, white felt would have been even easier. Also, glue would have been easier. One last thing: The brim is really floppy. It would look better stiffer. I think this might could be accomplished with schoolglue-and-water-mixture, or spray starch, but I haven’t yet experimented to figure out which. It would also work to cut it down to less width.
Boy: the cuffs 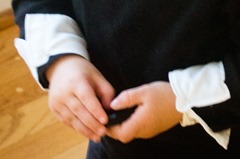 Again with the sheet; I just made two simple white rectangles, turned right side, and then basted the center of them over the center (inside) seam of his shirt sleeves, at the very bottom. They are actually sewn on, until after Halloween. Then the “cuffs” open on the outside, where you can see them, and are pinned so they make a V rather like the collar.
The great conclusion:
Three Halloween costumes, including a fairly pricey pattern that I’ll be able to use in the future, and fabric (about 75% of which I didn’t even need, and folded back up for future projects): $15. Less than the single costume I decided to buy for Squanto. :) If I hadn’t bought the pattern, this would have been 3 costumes for $5 total.


Thanks going to try this for grands school play
Hey, thanks for the great instructions and pattern. I’m helping out at my son’s school’s living history day tomorrow and at the last minute decided I’d try to make a few things to wear. Couldn’t have made the collar without you!